
| Detail | Value |
|---|---|
| Location | King of Prussia, PA (Montgomery County) |
| Service | Full Luxury Basement Remodel — Bar, Cigar Room, Wine Display, Full Bathroom, Custom Cabinetry & Millwork |
| Budget | $100,000 |
| Timeline | 2 months |
| Crew | Daniel, James, Marsel, Vitaly, Alex |
Overview
This luxury basement transformation in King of Prussia, Montgomery County, began with a concrete slab, exposed joists, and nothing between them — a raw, unfinished lower level with no rooms, no utilities, and no usable character. What the homeowners wanted was ambitious: not a simple finished basement, but a fully realized luxury entertainment suite built from the ground up, with spaces that rivaled the finishes and function of a high-end purpose-built venue.
ProBrothers' full crew — Daniel, James, Marsel, Vitaly, and Alex — took on the entire scope in-house: from design and layout planning through framing, rough-in trades, drywall, flooring, custom millwork, cabinetry, tile, glass installation, hardware, and final finish. Every trade, sequenced under a single contract, with a single point of accountability. Two months from empty slab to a finished suite that added $100,000 worth of genuine, appraised living space to the home.
The Client's Goal
The King of Prussia homeowners had an unfinished basement that represented the single largest untapped value in their home. The square footage was there. What was missing was the intent — and the execution to match it.
Their vision was specific: a full-service bar where guests could gather around a proper counter with a real sink; a dedicated cigar room separated from the entertainment area by glass so the room stayed visible but smoke stayed contained; a wine display that was architectural rather than incidental; a full bathroom finished to the same standard as the rest of the suite; custom storage that looked built-in rather than afterthought; and a clean solution for the mechanical room that didn't interrupt the luxury aesthetic with a utility door.
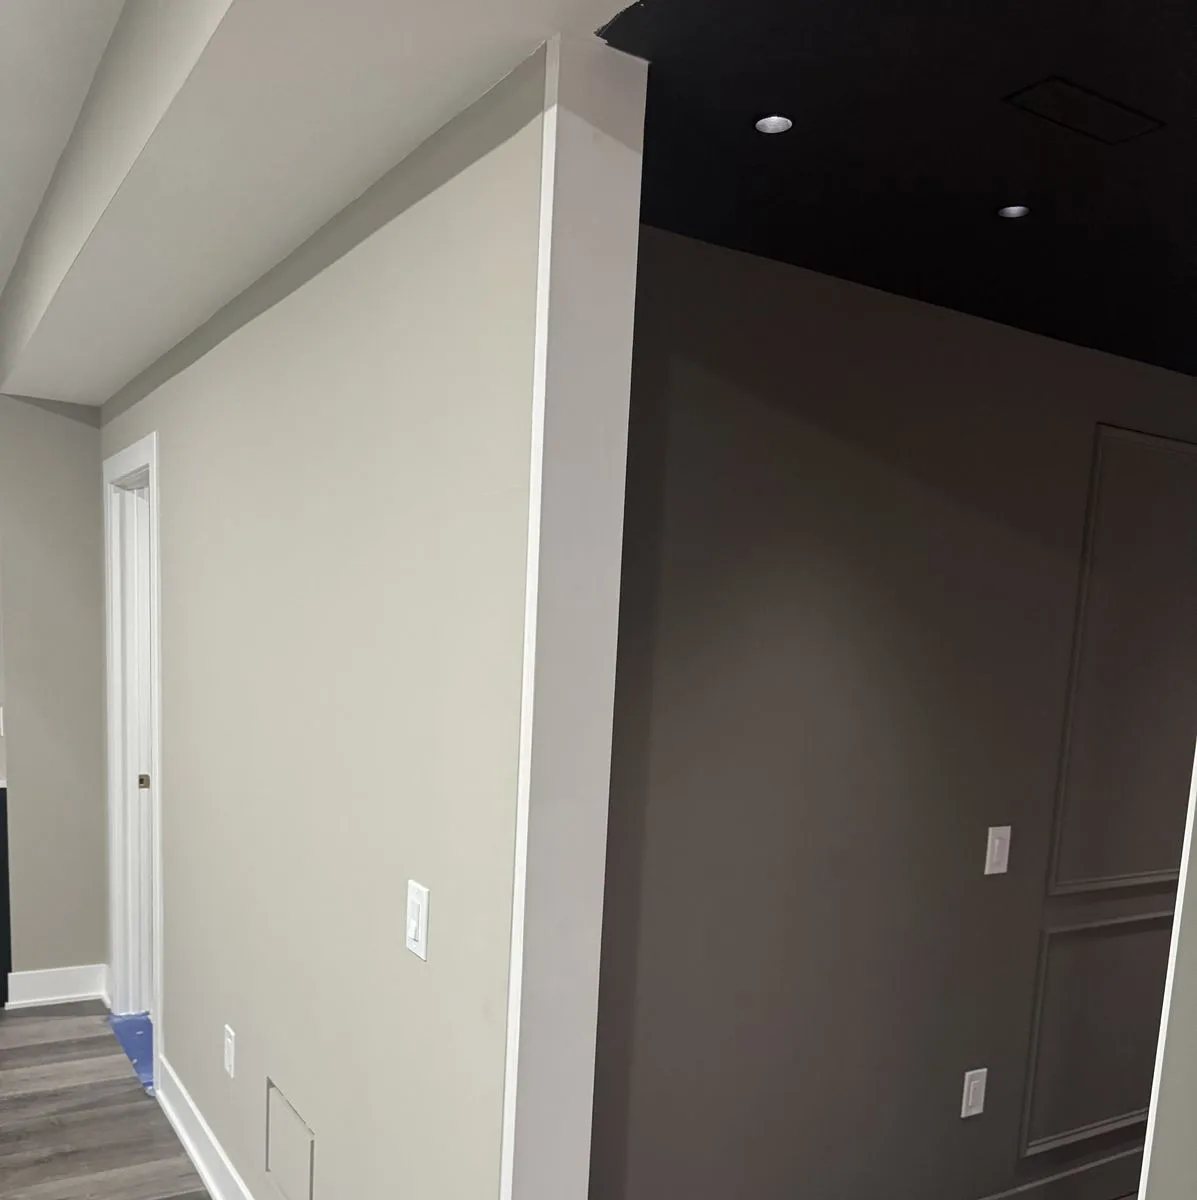
The hidden door requirement was the detail that separated this project from a standard luxury finish. The mechanical room had to be accessible, but it could not look like a door. ProBrothers' answer was a flush panel engineered to vanish into the surrounding picture-frame moulding — no visible frame, no visible gap, no hardware break. A detail that reads as invisible until someone knows it's there.
Scope of Work
- Designed the complete basement layout: bar zone, cigar room, wine display, entertainment area with pool table, full bathroom, storage wall, stair landing, and hidden utility access.
- Framed all perimeter walls, partition walls, and individual room structures including the cigar room enclosure and bathroom wet zone.
- Installed electrical wiring for recessed lighting, dedicated bar circuits, cigar room ventilation, and bathroom fans; ran plumbing lines for bar sink and bathroom fixtures.
- Installed drywall on all walls and ceilings; taped, mudded, and sanded to a paint-ready finish throughout.
- Installed premium LVP flooring across the full basement footprint.
- Installed decorative picture-frame moulding and baseboards throughout all finished rooms.
- Built and installed the hidden utility room door — flush panel engineered to match surrounding moulding exactly.
- Built and installed custom floor-to-ceiling storage cabinetry along the stair landing wall.
- Installed the full-service bar: custom cabinetry, quartz countertop, gold undermount sink, and integrated appliances.
- Installed custom oak stair treads and premium black metal railings down to the finished level.
- Built and glazed the cigar room glass partition wall with custom-fitted panels and gold-finish hardware.
- Installed wine display feature.
- Finished the bathroom in full: marble-look tile surround and dark slate floor tile, glass shower enclosure, toilet, vanity, and all fixtures.
- Painted all walls, ceilings, and trim in coordinated palette — warm beige main areas, dark accent for cigar room and entertainment zone.
- Completed all final detailing, hardware installation, and site cleanup.
Step-by-Step Process
Phase 1 — Layout Design and Planning
Before a single stud was set, the team spent time with the homeowners resolving the layout in detail. A basement of this complexity — with a wet zone (bar and bathroom), a ventilated enclosure (cigar room), a glass partition, a mechanical access requirement, and a pool table footprint all competing for the same floor space — does not work unless the layout is locked down before framing starts. Rough-in utilities follow framing; framing follows layout; get it wrong and the plumber and electrician can't do their work without tearing out walls.
Daniel led the planning phase, establishing the position of every room boundary, every utility rough-in, and every built-in element before the crew picked up framing lumber. The layout was the document the entire build would execute against.
Phase 2 — Framing, Electrical, and Plumbing Rough-In
Marsel's crew framed all perimeter walls and partition walls from the concrete slab up, creating the structural skeleton of the rooms. Every wall was framed to accommodate the subsequent trades: backing installed for the bar cabinet run, blocking placed for the glass panel system, shower rough-in framed and waterproofed for the bathroom wet zone, and the cigar room framed with the ventilation pathway in mind.
With framing complete, James ran all electrical circuits: recessed lighting throughout, dedicated circuits for bar refrigeration, the cigar room ventilation fan, bathroom exhaust, and general outlets at each zone. Plumbing lines were run to the bar sink position and the bathroom rough-in before drywall closed everything in. All rough-in work passed inspection before the next phase began.
Phase 3 — Drywall and Surface Preparation
With all rough-ins inspected and approved, the crew hung drywall on every wall and ceiling surface. The drywall phase in a project of this complexity requires careful planning around the glass panel openings, the cabinetry built-in locations, and the bathroom wet zone, where cement board replaces drywall in tile areas. Once hung, all surfaces were taped, mudded, and sanded to a consistent, paint-ready finish throughout.
This phase is invisible in the finished product — but it is what allows the moulding, tile, and cabinetry to sit flat and read as precision-built rather than applied over a lumpy substrate.
Phase 4 — Flooring, Moulding, and Hidden Door
Premium LVP flooring went in across the full basement footprint, chosen for its durability, visual warmth, and moisture-resistance appropriate to a below-grade space. Once the floor was set, the crew installed decorative picture-frame moulding throughout all main rooms, creating the architectural character that elevates the space from "finished basement" to "custom suite."
The hidden utility door was built and installed during this phase. The panel was fabricated to match the moulding profile, spacing, and finish of the surrounding wall panels exactly. When painted, the door disappeared into the wall pattern. The tolerance on the fit was tight: a visible gap or a color break between the panel and the surrounding wall would have exposed it immediately. Vitaly handled the panel fabrication and fitting, checking the reveal on all four edges repeatedly until the panel sat flush and the moulding ran continuous across it without interruption.
Phase 5 — Custom Cabinetry and Bar Installation
The storage wall along the staircase landing was built first: floor-to-ceiling custom cabinetry providing substantial organized storage that reads as a designed element of the room rather than an afterthought. The cabinetry was built in a warm taupe finish that coordinates with the wall color and hardware throughout.
The bar installation followed: base cabinetry in a dark finish matching the entertainment zone's accent palette, a full-length quartz countertop with a distinctive veining pattern, and a gold undermount bar sink that grounds the space in a clear material identity. An integrated beverage refrigerator was positioned behind the glass door panel in the base. Every element of the bar was positioned and leveled before the countertop was templated so the slab sat flat on the cabinet tops with no shimming or visible relief cuts.
Phase 6 — Stair Treads, Railings, and Glass Panels
Alex handled the stair tread and railing installation. Custom oak stair treads replaced the raw concrete descent into the basement, providing warmth and visual continuity with the premium LVP flooring at the base. The premium black metal railings were installed to match the dark accent color running through the entertainment zone and cabinetry — tying the stair landing into the design palette before you even enter the space.
The cigar room glass panel system was custom-fabricated and installed by the crew to define the room's boundary while keeping the entertainment area visually open. Glass panels with gold-finish hardware at the partition framing points created a clean, frameless appearance from the entertainment side. The same gold hardware threads through the bar sink, the shower, and the cigar room — a consistent material that gives the whole basement its luxury finish identity.
Phase 7 — Bathroom Tile, Fixtures, and Final Finish
The bathroom was finished last, after all wet rough-in work had been confirmed leak-free and the surrounding drywall was complete. Marble-look large-format tile was set on the shower surround from floor to ceiling, creating the bold, high-contrast focal wall that makes the bathroom read as a luxury amenity rather than a utilitarian addition. Dark slate floor tile was laid in the bathroom floor and shower base, giving the space a finished two-material palette.
The glass shower enclosure was fitted and hung last. All bathroom fixtures — toilet, vanity, shower valve, and fittings — were installed, tested, and confirmed before handover.
Final paint was applied throughout the basement: warm beige in the main corridors and entertainment areas, dark charcoal in the cigar room and accent zones. All trim, moulding, and cabinetry details were touched up; hardware was set on all cabinet doors and drawers; and the site was cleared and cleaned before handover.
Project Photos
Materials and Craftsmanship
- Framing Lumber — All partition walls framed in dimensional lumber from slab to joist. Framing is the skeleton of every room; getting it straight, plumb, and correctly positioned at this stage is what allows everything else to fit.
- Premium LVP Flooring — Selected for its visual warmth, durability, and resistance to moisture vapor that is inherent in any below-grade space. The wide-plank format and warm grey-brown tone coordinates with the beige wall palette throughout the main areas.
- Picture-Frame Trim Moulding — Run across the main entertaining areas and hallway to create the architectural character that defines the space. The panel geometry was scaled to the ceiling height so the frames read proportionally correct and give each wall a designed, resolved appearance.
- Custom Floor-to-Ceiling Cabinetry — Built to room dimensions for the storage wall, and to bar-cabinet dimensions for the entertainment zone. No off-the-shelf units: every piece is fabricated for the space, which is why they sit flush to ceiling and wall with no visible gaps or filler strips.
- Quartz Bar Countertop — Slabbed and templated to the exact dimensions of the bar run. The veined quartz pattern selected coordinates with the gold hardware and dark cabinetry without competing with either.
- Gold Undermount Sink & Hardware — A single finish decision that runs through bar sink, shower fitting, and cigar room partition hardware to give the entire basement a unified material identity. Brushed gold in a space dominated by dark wood and warm neutrals reads warm and intentional.
- Marble-Look Tile (Bathroom) — Large-format tile set floor-to-ceiling in the shower surround. The bold scale of the pattern requires precise layout planning to avoid slivers at the corners and to center the visual anchor tile on the back shower wall.
- Custom Glass Panels (Cigar Room) — Frameless glass panels with gold hardware at the partition frame points. The frameless appearance is achieved by precision-fitting the panels into channel receivers at floor and ceiling rather than into a visible metal frame.
- Custom Oak Stair Treads — Solid oak treads with a finish that reads as natural and warm against the dark metal railing system. The tread-to-railing material contrast is intentional: it prevents the stair from reading as a single dark mass descending into the space.
Challenges and How We Solved Them
- Coordinating multiple trades in a single-contract scope. A project of this complexity — framing, electrical, plumbing, HVAC, drywall, flooring, custom millwork, cabinetry, glass, tile, and finish work — normally involves multiple subcontractors across multiple contracts, with the homeowner or a general contractor managing the sequencing. ProBrothers handled all of it under a single contract with a single crew. The advantage is that sequencing conflicts are resolved internally: when the plumber needs backing that hasn't been framed yet, the framing crew knows before the plumber shows up. No waiting, no miscommunication, no delay from a sub who doesn't know what's next.
- Building the hidden door to disappear. The mechanical room access panel is the detail that cannot be faked at inspection. A moulding panel that looks like a door — even subtly — reads as an afterthought. The solution was to fabricate the panel from the same stock as the surrounding picture-frame moulding, set it with the same reveal depth and paint it in the same batch as the wall finish, and fit the edge gaps to the same dimension as the moulding joints. The result is a panel that the crew can identify only because they built it. Visitors cannot.
- Managing moisture risk below grade. Every below-grade renovation in southeastern Pennsylvania faces the same structural reality: moisture vapor moves through concrete. The material choices in this project were all made with that in mind — LVP flooring over hardwood, cement board in the bathroom wet zone, appropriate primer on all drywall before paint, and correct ventilation for the cigar room. Getting these details right at the specification stage is what prevents callbacks and remediation work two years after the project closes.
- Delivering a $100,000 finish on a two-month schedule. A full luxury basement build with this scope would normally take 12–16 weeks when contracted across multiple subcontractors with independent schedules. ProBrothers completed it in 8 weeks by sequencing the phases so that no trade was ever waiting on another to clear. While flooring was being set in one zone, custom cabinetry was being built in another. While tile cured in the bathroom, the glass panel installation was happening in the cigar room. A coordinated crew executing a sequenced plan delivers on the schedule a fragmented multi-sub approach cannot.
The Result
What had been an unfinished concrete slab with exposed joists became the best room in the house. A full entertainment suite with a proper bar, a glass-enclosed cigar lounge, a wine display, a luxury bathroom, and a pool table area — all finished to the same standard as the rooms above, and in some respects to a higher one.
The hidden utility door works perfectly: not a single guest has identified it without being shown. The quartz bar with its gold sink is the gathering point every bar renovation aims for but few achieve. The bathroom tile holds up to close inspection. The oak stair treads and black metal railing set the tone before anyone has stepped off the bottom stair.
The project was completed in 2 months, within the $100,000 budget, and to a finish standard the homeowners describe as exceeding their initial vision.
Why It Matters for King of Prussia Homeowners
King of Prussia and the broader Upper Merion Township area sit at one of the highest home value points in Montgomery County — but a significant percentage of homes in the area have unfinished or under-finished basements that are not contributing to the home's livable square footage or its market value. A luxury basement finish at the scope and quality of this project adds genuine appraised value, genuine usable space, and the kind of differentiation that matters when the home goes to market.
For homeowners in King of Prussia, Wayne, Berwyn, Paoli, or anywhere in Montgomery or Chester County who have an unfinished basement, this project demonstrates what is achievable in 2 months at $100,000: a complete luxury entertainment suite, not a painted slab with a drop ceiling. ProBrothers manages the entire process under a single contract — one point of contact, one schedule, one accountability.
ProBrothers Construction serves homeowners throughout southeastern Pennsylvania, including Montgomery County, Chester County, Delaware County, and the Philadelphia Main Line.
Frequently Asked Questions
How much does a luxury basement remodel cost in King of Prussia, PA?
This King of Prussia luxury basement — full framing, electrical, plumbing, premium flooring, custom bar with quartz and gold sink, cigar room with glass panels, wine display, full bathroom with marble-look tile, decorative wall moulding, hidden utility room, and oak stair treads — came in at $100,000 over 2 months. A standard finished basement in southeastern Pennsylvania runs $40,000–$70,000; a luxury multi-room build like this runs $80,000–$150,000+. ProBrothers provides free on-site estimates.
How long does a full luxury basement remodel take?
This King of Prussia project — full framing, rough-in trades, drywall, flooring, custom cabinetry, bar, bathroom, glass panels, moulding, and all finish work — was completed in 2 months. A standard finished basement runs 6–10 weeks; a multi-room luxury scope with custom millwork, glass installations, and full-service bar adds 2–4 weeks. ProBrothers schedules work in phases so trades don't stack and inspections clear on schedule.
What is a hidden utility room door and why does it matter?
A hidden utility room door is a custom-built panel that mimics the surrounding decorative wall moulding precisely, so the access point to the mechanical space disappears into the wall design. There is no visible door frame, no handle break in the wall pattern — just a flush panel that opens when pressed. ProBrothers built this flush panel to match the surrounding picture-frame moulding so precisely that visitors cannot identify the door without being shown it.
Does ProBrothers do basement remodeling in King of Prussia and Montgomery County?
Yes. ProBrothers serves homeowners throughout southeastern Pennsylvania including King of Prussia, Wayne, Berwyn, Paoli, Malvern, Ardmore, and communities across Montgomery County, Chester County, and Delaware County. Contact us for a free in-home estimate.
What permits are required for a basement remodel in King of Prussia, PA?
In Upper Merion Township (King of Prussia), basement finishing that includes framing, electrical, plumbing, and HVAC requires a building permit and separate trade permits. Permit fees in Montgomery County municipalities typically run $300–$1,200 depending on project value; inspection holds apply at framing, rough-in, and final stages. ProBrothers manages the permit process on all projects.
Start Your Basement Remodel
ProBrothers serves King of Prussia, Wayne, Berwyn, Paoli, and communities throughout southeastern Pennsylvania. Free on-site estimate within one business day.